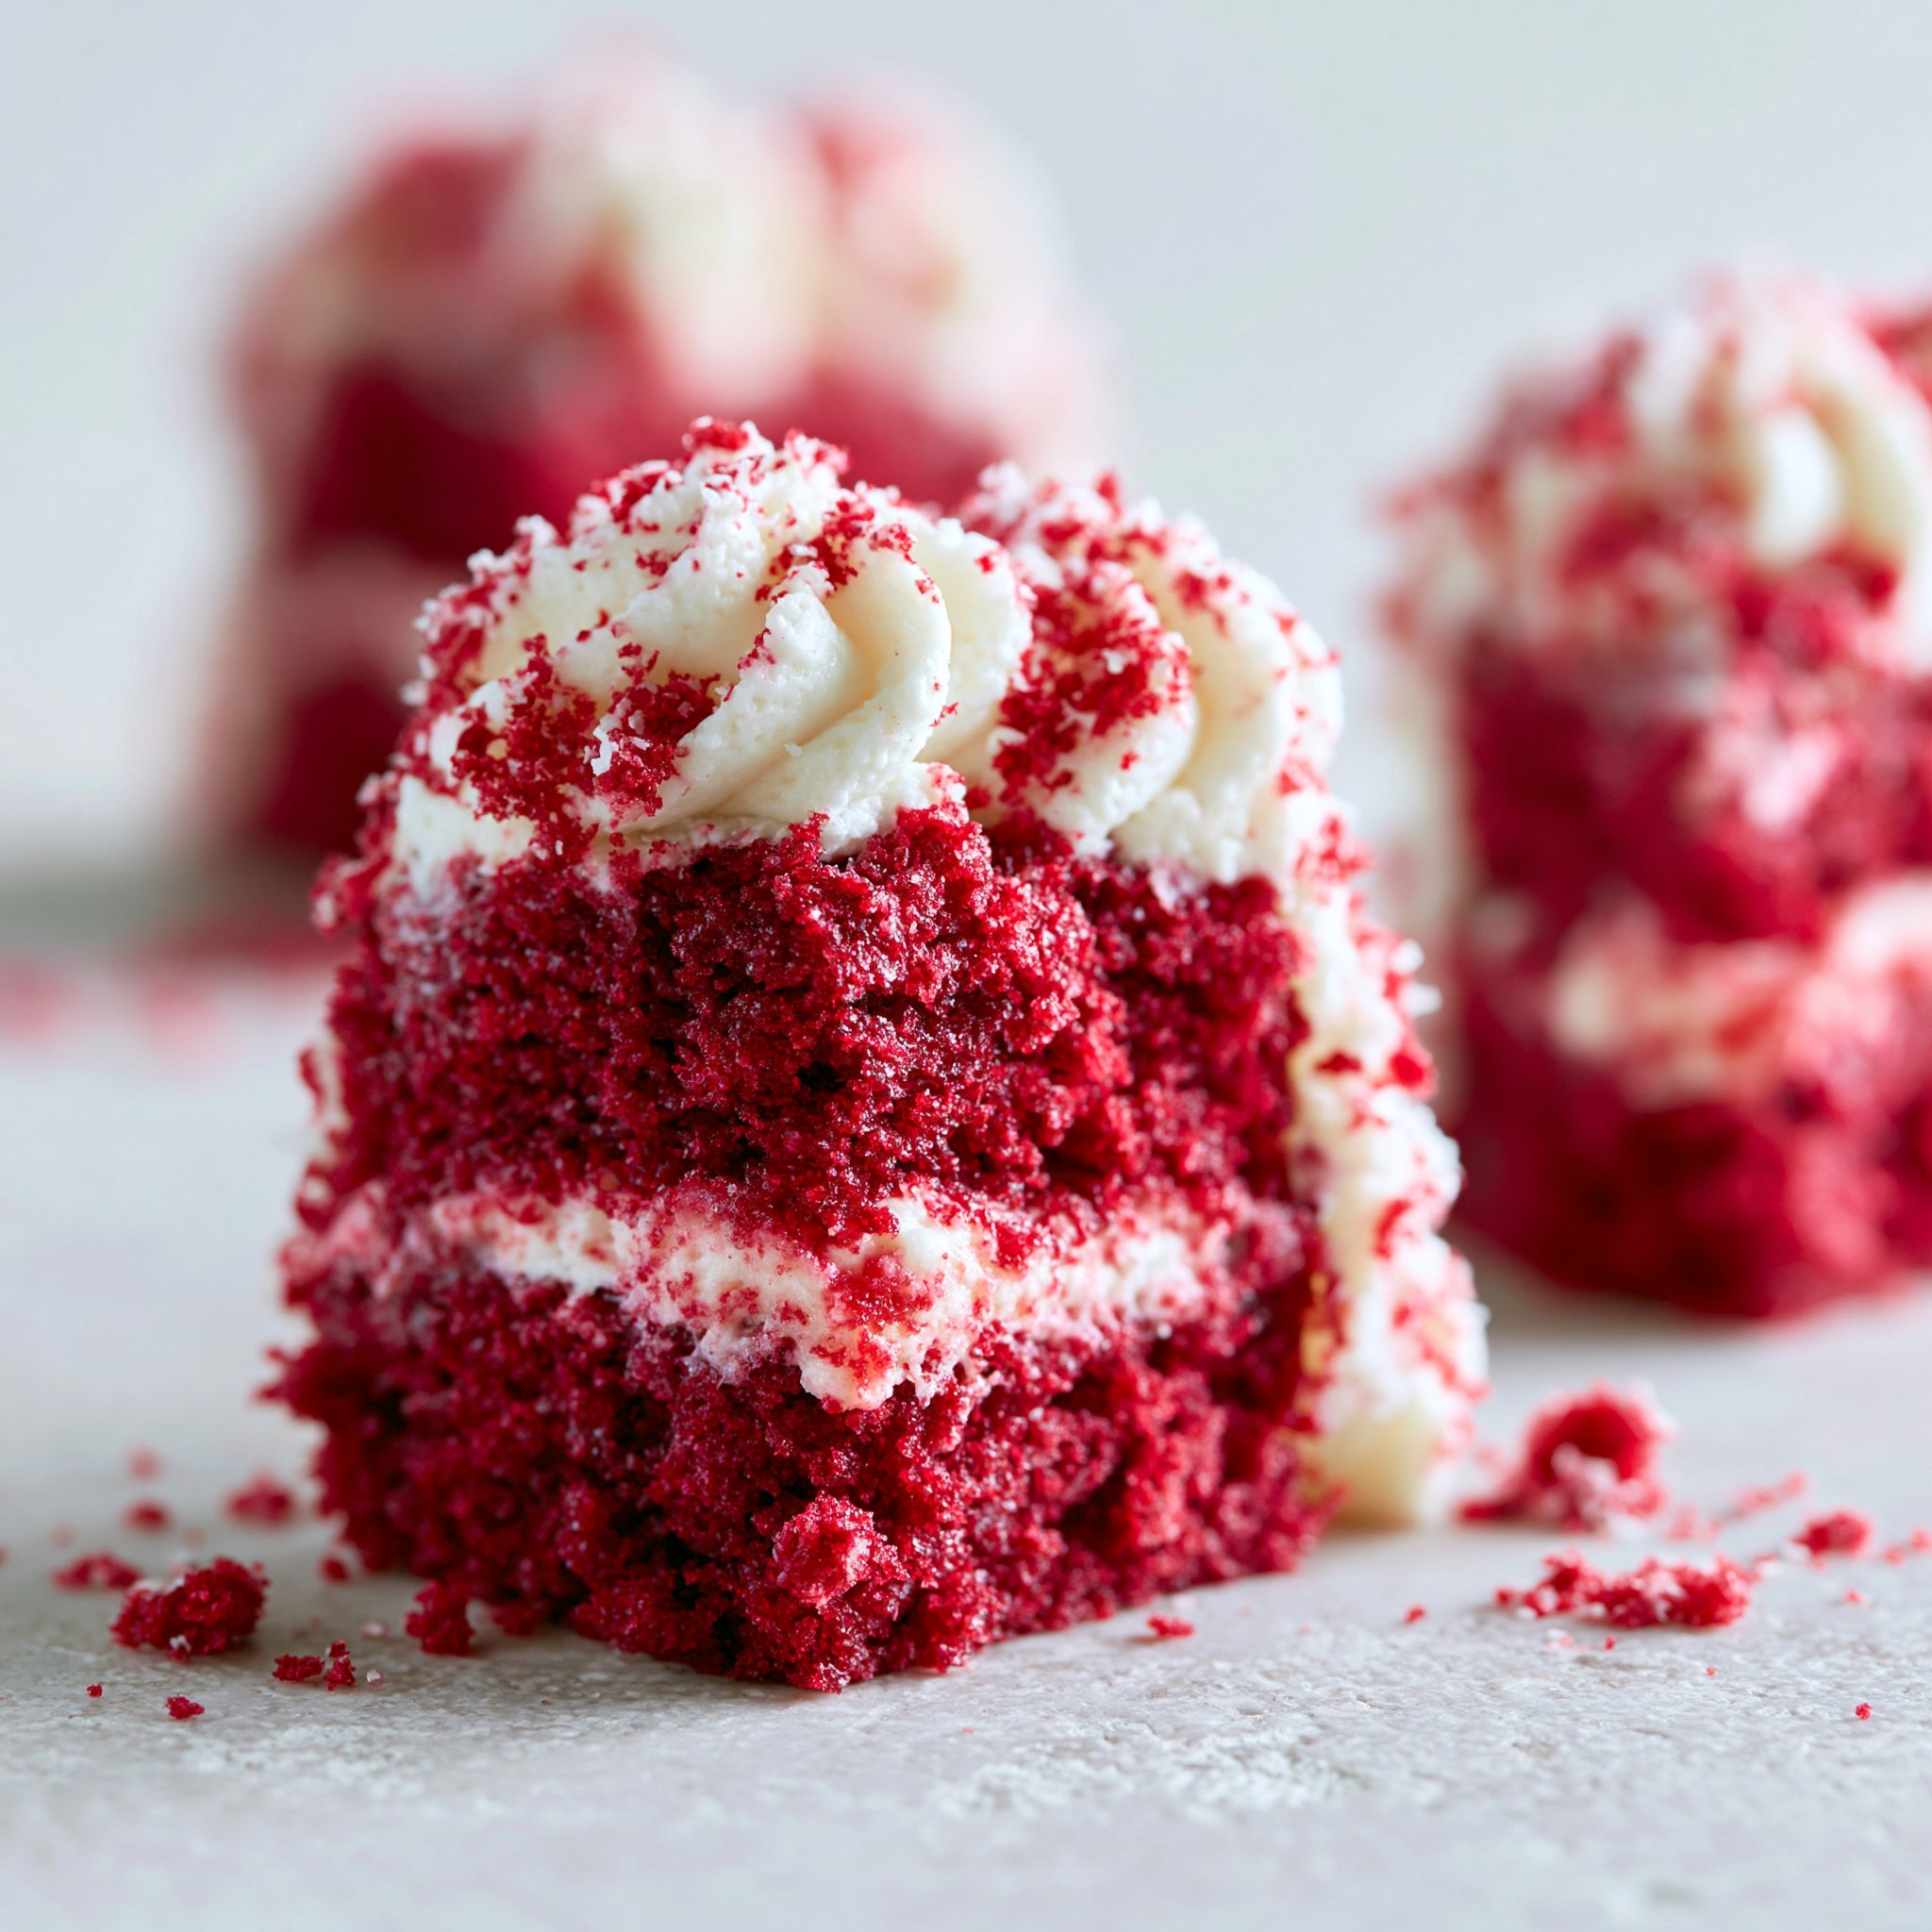
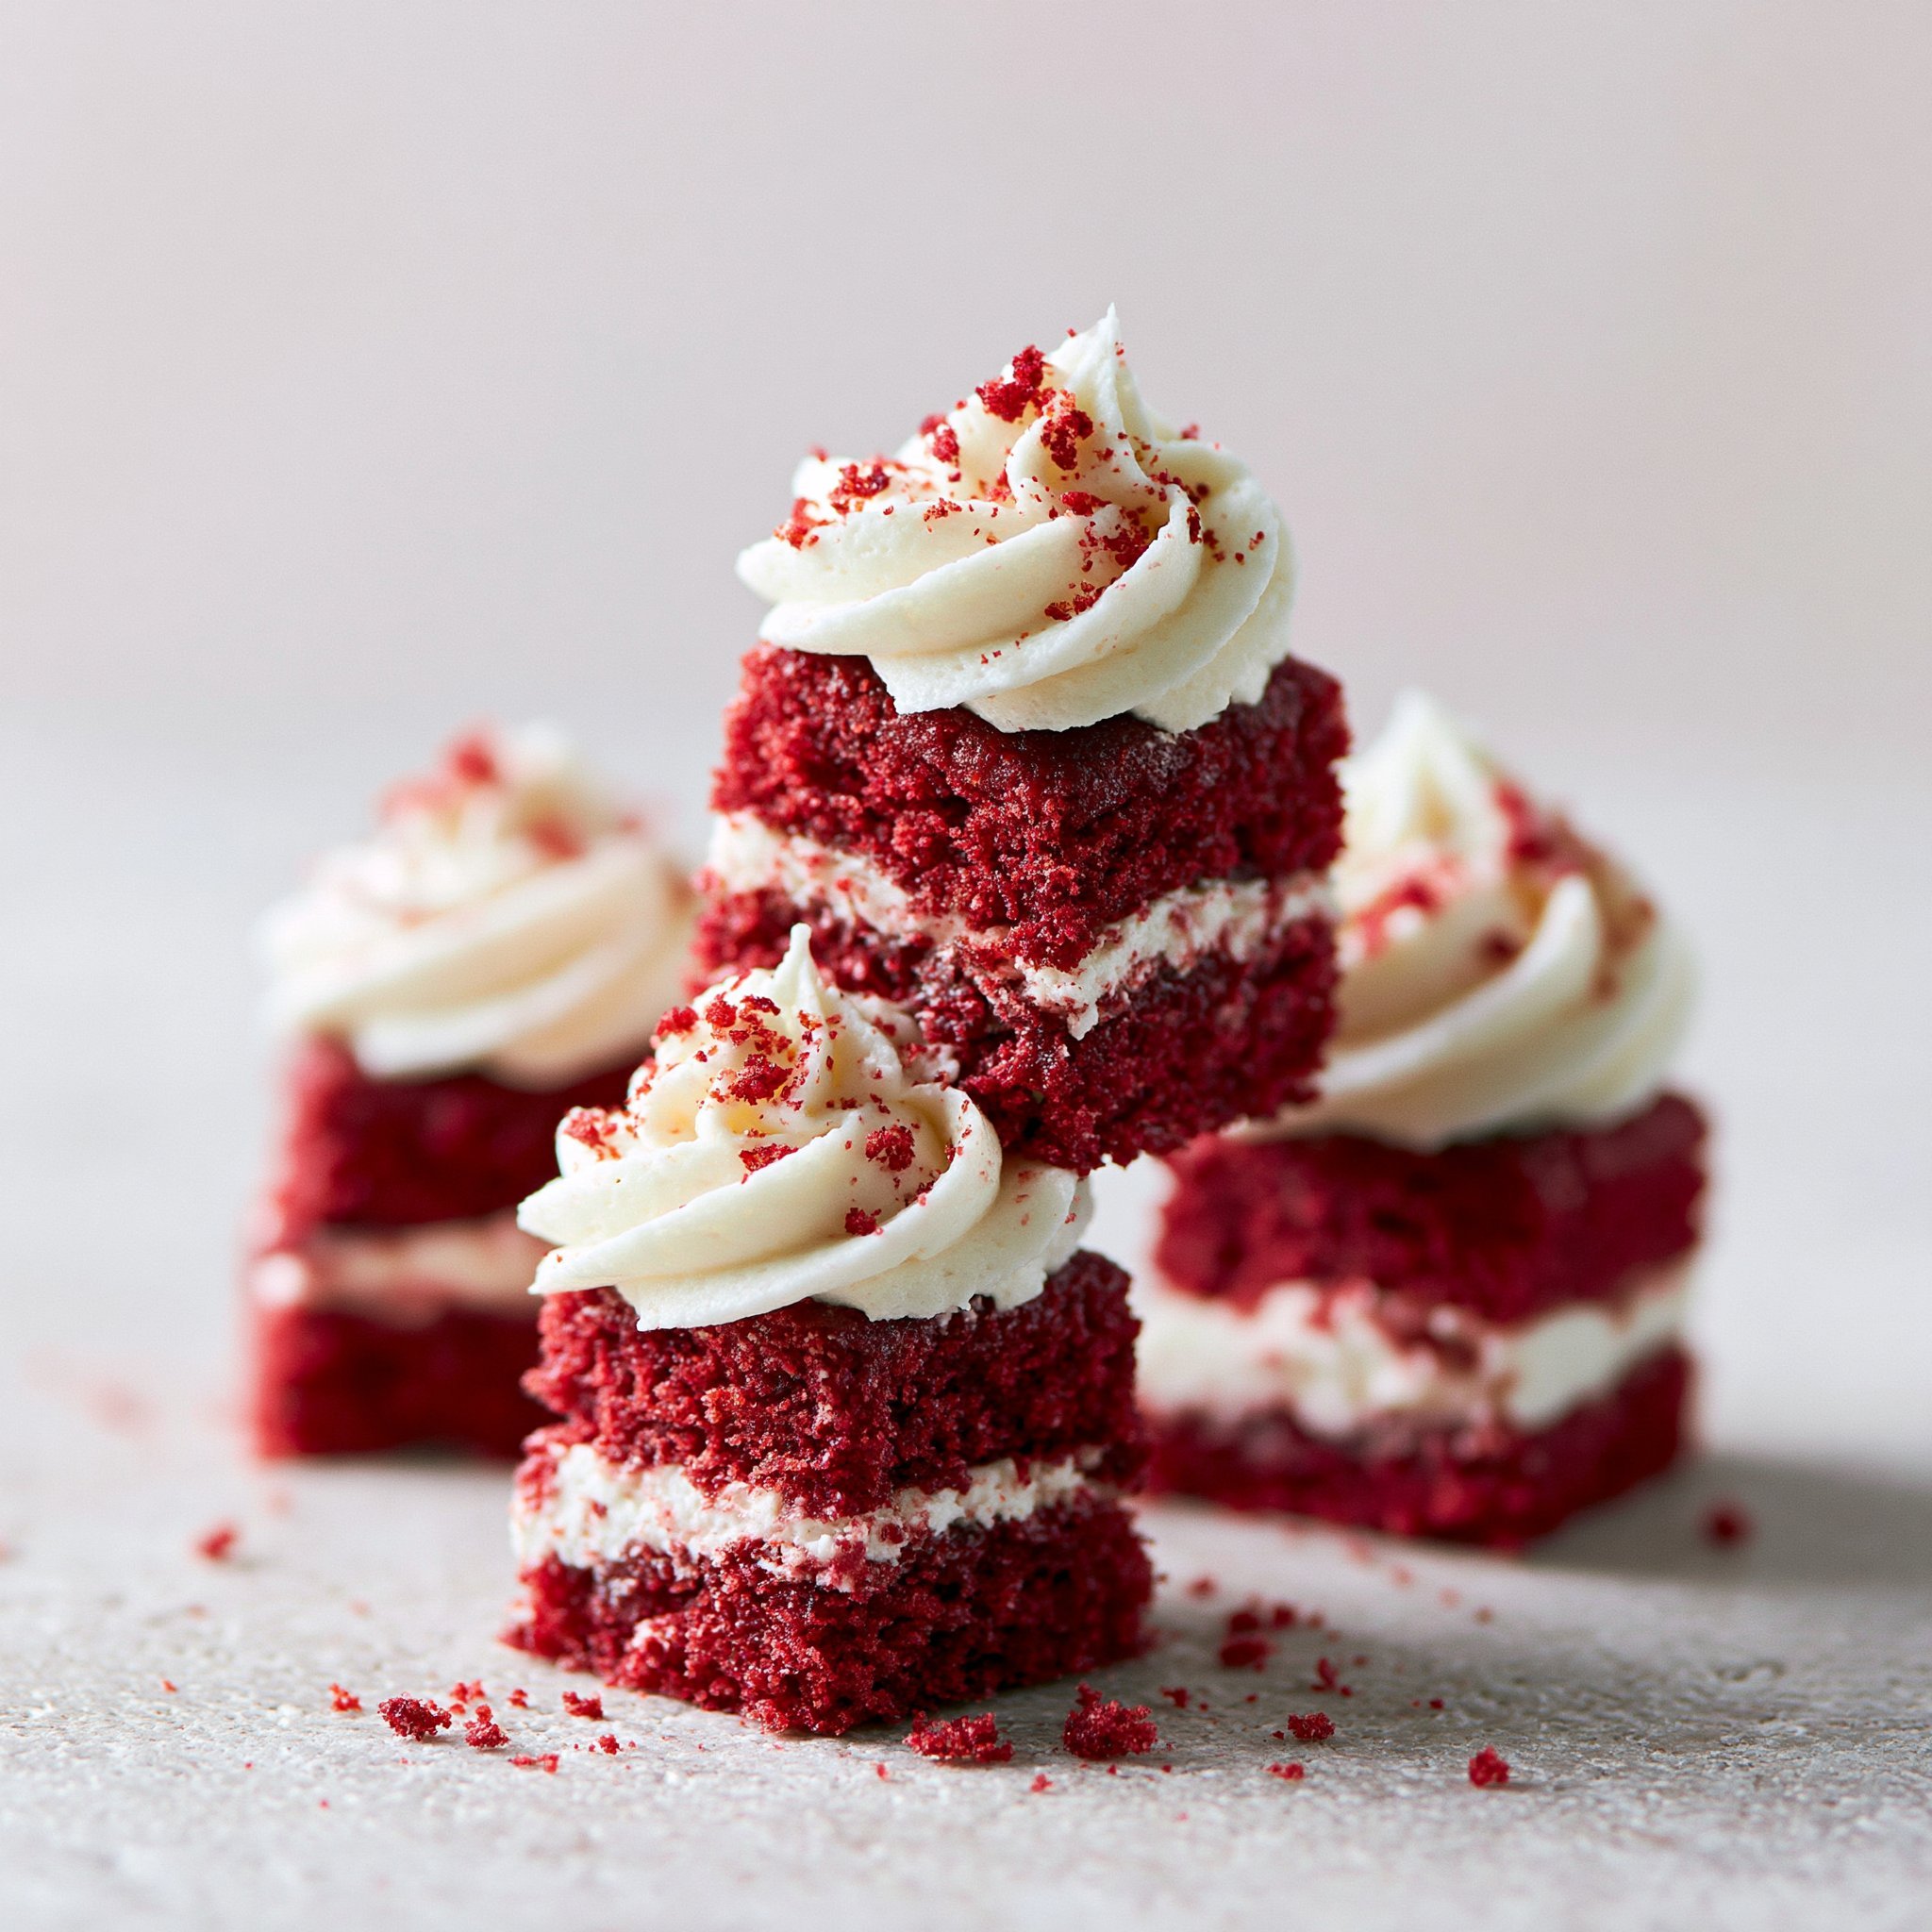
The best part about these red velvet cake minis is how quickly they deliver that classic red velvet vibe: a soft, tender crumb with a gentle cocoa aroma and a bright red color that pops the second you peel back the liner. They bake in about the time it takes to wash a couple of bowls, and the cream cheese frosting goes on thick and fluffy.
I make these when I want something that feels a little special but doesn’t ask for layers, leveling, or fancy tools. If you’re curious about the cook behind Citrus and Crave, you can get to know me on the about page—and then come right back and bake.
Why You’ll Love This Recipe
- Mini format means quick baking: the cakes are done in 10–12 minutes, so you’re not waiting on a full-size layer to cool.
- Buttermilk + oil make a plush, moist crumb that stays soft even after chilling.
- Just enough cocoa (2 tablespoons) for a subtle chocolate warmth without turning it into a chocolate cake.
- The batter mixes fast and doesn’t require a mixer—just whisk, combine, and stop as soon as the flour disappears.
- Cream cheese frosting is tangy-sweet and sets up nicely on the cooled minis without sliding off.
- The liners make portioning and serving neat (and they look bakery-cute with minimal effort).
The Story Behind This Recipe
I wanted a true red velvet feel without committing to a whole cake, so I tested this as a mini muffin-tin version: same familiar flavor and color, but faster bake time, easier frosting, and zero slicing—just grab one and go.
What It Tastes Like
These taste like classic red velvet in bite form: lightly cocoa-scented cake with vanilla in the background, not overly chocolatey, and pleasantly sweet. The crumb is soft and springy from the buttermilk and baking soda, and the cream cheese frosting adds that tangy, rich contrast that makes each bite feel balanced instead of sugary.
Ingredients You’ll Need
A few details make these minis work: buttermilk gives tenderness and a slight tang that screams “red velvet,” while vegetable oil keeps the cakes moist without needing extra mixing. Unsweetened cocoa powder adds that signature warm note (don’t overdo it), and red food coloring gives you the bold color you’re after. For the frosting, let the cream cheese and butter fully soften so the finish whips up smooth, not lumpy. (If you want to understand how I write and test recipes, it’s also worth skimming the recipe disclaimer before you bake.)
- 1 cup all-purpose flour
- 1 cup granulated sugar
- 2 tablespoons unsweetened cocoa powder
- 1 teaspoon baking soda
- 1/2 teaspoon salt
- 1/2 cup vegetable oil
- 1/2 cup buttermilk
- 1 large egg
- 1 tablespoon red food coloring
- 1 teaspoon vanilla extract
- 4 ounces cream cheese, softened
- 1/2 cup unsalted butter, softened
- 2 cups powdered sugar
- 1 teaspoon vanilla extract
How to Make Red Velvet Cake Minis
- Prep the oven and pan. Heat the oven to 350°F (175°C). Line a mini muffin tin with paper liners so the cakes lift out cleanly and keep their shape.
- Whisk the dry ingredients. In a medium bowl, whisk together the flour, granulated sugar, cocoa powder, baking soda, and salt until the cocoa looks evenly dispersed (no dark streaks).
- Whisk the wet ingredients. In a second bowl, whisk the vegetable oil, buttermilk, egg, red food coloring, and vanilla until the mixture looks smooth and uniformly red.
- Combine—gently. Pour the wet ingredients into the dry ingredients and mix just until you don’t see dry flour. The batter should look smooth and pourable; stop mixing as soon as it comes together to keep the minis tender.
- Fill the cups. Spoon batter into the lined mini muffin cups, filling each about 2/3 full. This gives the cakes room to rise into a neat little dome without overflowing.
- Bake. Bake for 10–12 minutes, until the tops spring back lightly when touched and a toothpick inserted in the center comes out clean.
- Cool completely. Let the mini cakes cool fully before frosting—if they’re even a little warm, the frosting will soften and slide.
- Make the frosting. Beat the softened cream cheese and softened butter until completely smooth. Gradually add the powdered sugar, then beat in the vanilla, until the frosting is fluffy and spreadable.
- Frost generously. Frost the cooled minis with a thick swoop. The tangy frosting is part of the point here—don’t be shy.
Tips for Best Results
- Measure the “2/3 full” carefully. Overfilling is the quickest way to get muffin-top spillover and uneven minis; underfilling can make them look squat.
- Mix only until the batter comes together. Once the flour disappears, stop—overmixing can make the crumb tighter instead of plush.
- Cool before frosting (really). These tiny cakes hold heat in the center; give them time so the frosting stays airy and defined.
- Soften the cream cheese and butter fully. If either is too cool, the frosting won’t beat smooth and you’ll end up chasing lumps.
- Use a toothpick cue plus a touch test. A clean toothpick and a springy top together are the best signal they’re baked through without drying out.
Variations and Substitutions
- Deeper red color: You can add a little more red food coloring for a more dramatic shade; the batter should look clearly red before baking.
- Sweeter or tangier frosting balance: You can adjust the powdered sugar slightly to taste—less makes it more tang-forward, more makes it firmer and sweeter (texture will shift accordingly).
- Vanilla-forward finish: Keep the vanilla as written; it’s doing quiet work in both cake and frosting to round out the cocoa and cream cheese.
How to Serve It
Serve these slightly cool or at cool room temperature so the frosting holds its shape and the cake stays springy. I like arranging them on a platter so the red cake peeks out from the liners, then adding an extra swoop of frosting on top for that “mini cupcake” look. If you’re serving them after chilling, let them sit out briefly so the cake loses its fridge-firm edge. (If you browse the site, note that the cookie policy explains how preferences are stored.)
How to Store It
Because of the cream cheese frosting, store these covered in the refrigerator. They’re best when the cakes are protected from air (so they don’t dry out) and the frosting stays cool and set. If you want the softest texture, let the minis sit out for a short time before serving so the frosting and cake lose their chill.
Final Thoughts
These red velvet cake minis are the kind of small-batch baking that pays off fast: quick whisked batter, a short bake, and a swoop of tangy frosting that makes each bite feel complete. Keep the mixing gentle, cool them fully, and you’ll get tender little cakes with that classic red velvet cocoa-vanilla warmth.
Conclusion
If you’d like to compare approaches, I enjoy looking at recipes like Red Velvet Cake Minis from Sprinkle Bakes, Super-Moist Mini Red Velvet Cakes from Amycakes Bakes, and Small Batch Red Velvet Cake from Sugar & Sparrow to see how different mixing methods and frosting styles change the final crumb and finish. For site details beyond the recipe itself, you can review the privacy policy and the terms and conditions before browsing further.